Task 3: Upload data to the DDM
You have created a DDM and a macro that can populate the required tables in the DDM from a selected Excel file.
In this task, you will run the macro, check the status of the macro in Queue Management, then use the View feature in Data Management to verify the tables have been populated in the DDM.
First, you run the macro.
-
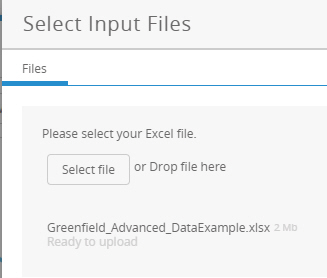
In Macros, select the macro you created in the previous task, then click Run. You see the Select Input Files flyout.
-
Select the Greenfield_Advanced_DataExamples.xlsx file you downloaded at the start of this tutorial:
-
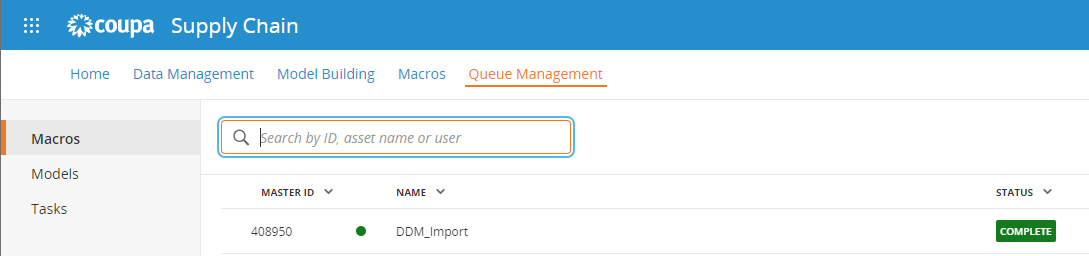
Click OK. The macro starts running.
-
In Queue Management, make sure the Macros tab is selected. When the macro finishes running, you see a Status of "Complete".
You can now confirm that the DDM tables were populated in Data Management.
-
In Data Management, select your DDM.
-
In the kebab menu, select View, then select Hide Empty Tables from the table display icon.
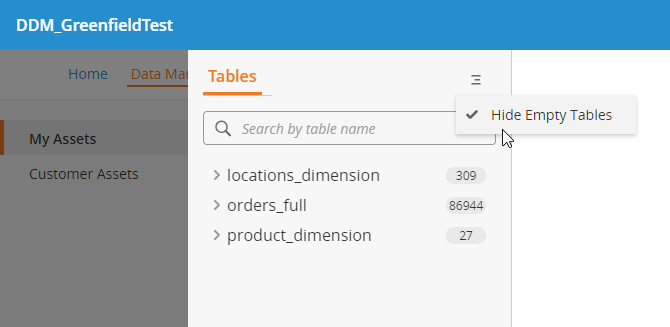
The required tables are populated. You are now ready to create a model recipe!