Creating joins
Joins enable you to establish relationships between tables in order to minimize redundant data. You can use them to return records from two tables that are joined by one or more columns with the same name and values. Joins that group more than two columns are called compound joins.
You can create the following types of joins:
- Inner join
 — returns records where the values from both tables match.
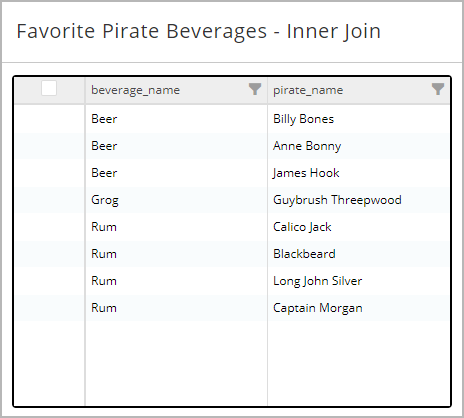
- Left outer join
 — returns all records from the first table and any matching records from the second table.
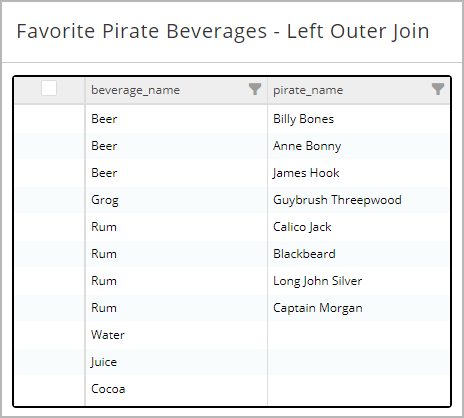
- Right outer join
 — returns all records from the second table and any matching records from the first table.
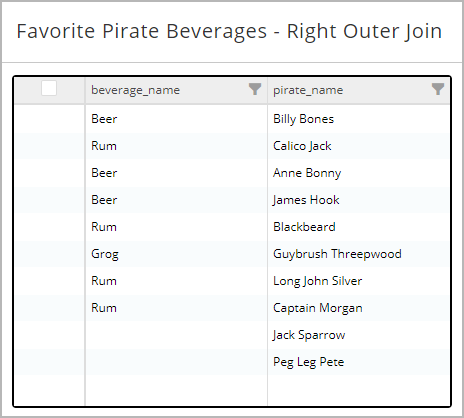
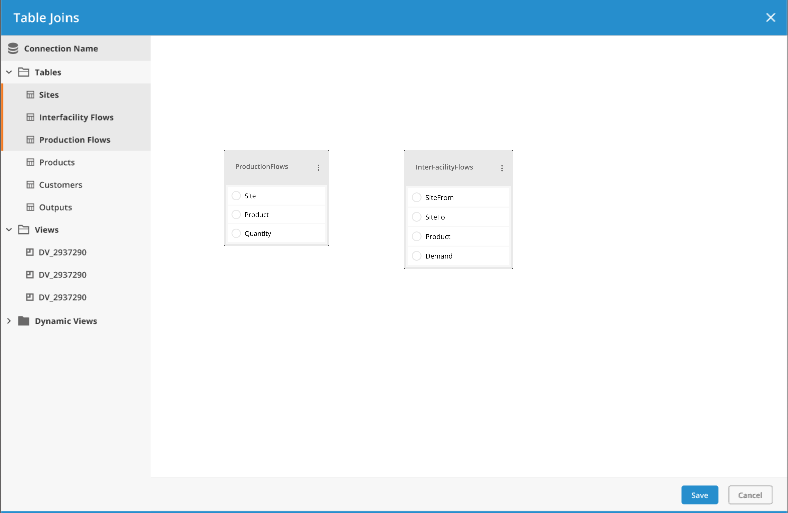
- On the Configure tab of the action, click Create Joins. The Table Joins page appears.
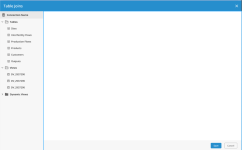
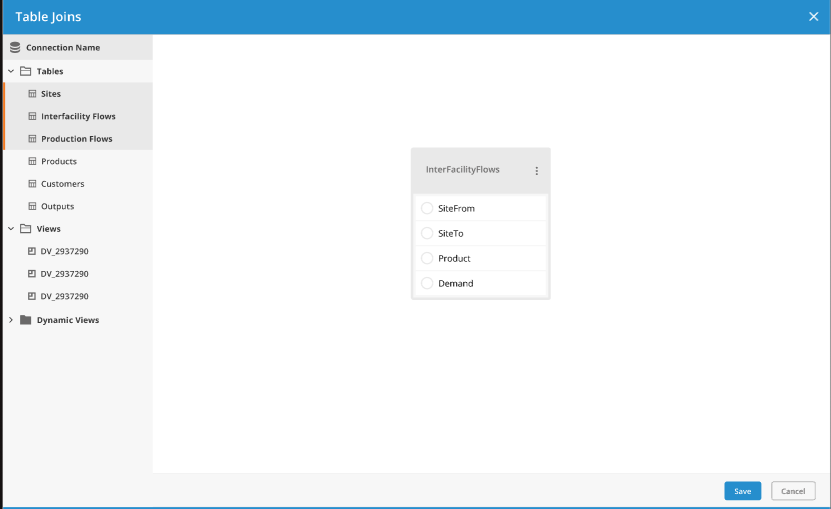
- On the Table Joins page, select a table for the join from the list on the left. Click and drag the table onto the workspace. The table name and a list of its fields appears in the workspace.
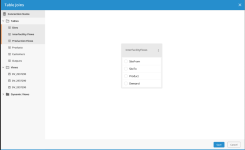
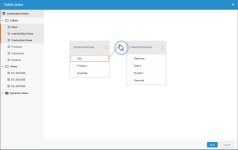
- Select a table that you want to join to the first table. Click and drag this table onto the workspace.

- Click and drag a connection line between the fields in each table that need to be connected.
 Note: Joins are not allowed on Blob, VarcharMax and float fields.
 - Specify the rows to include in the join by clicking the join symbol on the connection line . Select whether to include all rows from the first table, all rows from the second table, or all rows from both tables.
- If you need to connect multiple fields within the tables, add those connections. This creates a compound join.
- If you need to create a join with another table, add the table and then connect the appropriate fields.
There is no limit to the number of times you can add a table to the workspace, but each one must have a unique name.
- Click Save.
- If you need to cancel your changes, click Cancel
 .
.
- If you need to cancel your changes, click Cancel


- On the Configure tab of the action, click Edit Joins.
- Identify the join that you want to edit.
- Edit the join:
- Right click on the join symbol to adjust the join. Select whether to include all rows from the first table, all rows from the second table, or all rows from both tables. Changing a join type between two tables affects other join types between the two tables.
- If you need to adjust which fields are in the join, right click on the join symbol and select Remove. Add a new join as needed.
- Right click on the join symbol
- Click Save.
- If you need to cancel your changes, click Cancel .
- On the Configure tab of the action, click Edit Joins.
- On the Table Joins page, select the table and drag it onto the workspace.
The table's fields are displayed.
You can filter the list of fields in a table to make it easier to find the field you need.
- On the Configure tab of the action, click Edit Joins.
- From the table you need to filter, type the filter text in the filter field and press Enter.
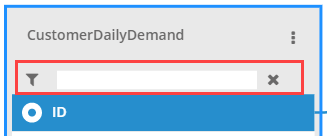
The fields in the table that match the filter are displayed.
Use this procedure when you have created a join from within the action. If no join has been defined within the action, see Access a join from a widget or macro.
- In the Statement Editor, click Add Statement.

A blank statement ribbon is displayed.
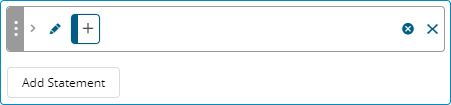
- Click
 , and select a table from the list of aliased tables defined in the Table Joins. The list of tables is restricted to the tables included in the action's joins.
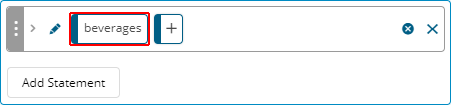
- Click , and specify a field. The available fields will depend on the selected table and the joins that affect that table.
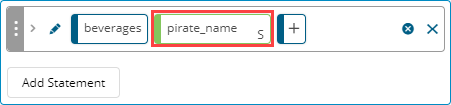
- If necessary, add further statements to the query to include additional fields.
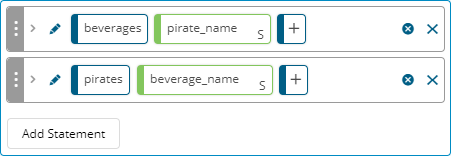 Fields available for selection from a join are always from the second table specified in a join. To include fields from both of the tables that make up a join, create additional statements.
In some cases, you may want to use an aliased version of a table. For example, you can use an aliased version of a Sites table to create one join for source sites and one for destinations.
- On the Configure tab of the action, click Edit Joins.
- On the Table Joins page, click the Options menu of the table you want to copy, and select Duplicate.
A copy of the table appears. The new table will have the same name with "_1" added. If there is more than one copy, the number will incremented for each copy. You can rename the table.
- Click Save.
- If you need to cancel your changes, click Cancel.
- On the Configure tab of the action, click Edit Joins.
- On the Table Joins page, click the Options menu
 of the table you want to rename, and select Rename.
- Type a new table name and press Enter. The name may not include spaces.
- Click Save.
- If you need to cancel your changes, click Cancel.
- On the Configure tab of the action, click Edit Joins.
- Do either of the following:
 Delete one or more joins
- For each join that you want to delete, right click on the join symbol between the tables and select Remove.
Delete all joins to a table- From the Options menu of the table , select Unjoin All.
- Confirm your deletion when prompted.
- Click Save.
- If you need to cancel your changes, click Cancel .
- If you need to cancel your changes, click Cancel
- On the Configure tab of the action, in the Table Joins section, click Delete.
- Confirm your deletion when prompted.
- Click Save.
- If you need to cancel your changes, click Cancel .
- On the Configure tab of the action, click Edit Joins.
- In the Table Joins page, click the Options menu
 of the table you want to delete, and select Remove.
- Click Save.
- If you need to cancel your changes, click Cancel.
Last modified: Friday May 12, 2023