Attaching a database in SQL Server Management Studio
After you download a database asset from llama.ai, you can attach it to a local SQL Server instance using SQL Server Management Studio (SSMS). This topic will review two methods:
-
Attach the database using the SSMS interface
-
Use a T-SQL script to attach the database
If you do not already have SSMS installed, you can get the latest download from Microsoft here:
This topic provides general guidance about attaching database assets. Additional troubleshooting articles are available in the Coupa Support portal. If you have issues after reviewing this information, please contact your company IT or SQL team.
Attach the database using the SSMS interface
When attaching a database (.mdf or .scgm file) using the SSMS interface, you first need to connect to the instance, then attach the database to the current instance.
Connecting to the SQL Server Instance
-
Open SSMS.
-
In the Object Explorer, select the Connect dropdown, then click Database Engine.
-
In the Connect to Server page:
-
Select “Database Engine” for the Server type.
-
Select or enter your Server name. If connecting to your default local SQL Server instance, you can enter a period (.) as the Server name.
-
For the Authentication, this will be one of the following, based on how your instance is set up:
-
Windows Authentication – this method uses your Windows credentials.
-
SQL Server Authentication – this method requires a valid SQL Server Login and Password.
-
-
Click Connect.
Once you are connected, you see the SQL Server instance name when using the SSMS Object Explorer.
Attach a database using the SSMS UI
-
Right-click Databases and select Attach…
-
In the Attach Database dialog box, click Add…
-
In the Locate Database Files dialog box, select the folder where the database is located. Expand the directory tree to find and select the .mdf or .scgm file. Keep in mind that the files are filtered for Database Data Files (*.mdf) by default. If you are searching for a model database (.scgm), change the filter to All Files (*). Select the database file and click OK.
-
If there is no _log.ldf file associated with your database, select it in the database details (the bottom pane) and click Remove.
-
Once you have the correct file(s) selected in the bottom pane, click OK.
-
-
View your database in the Object Explorer.
Attach the database using a T-SQL script
If you have issues attaching your database to SSMS using the process described above, you can create a script using T-SQL.
-
Open SSMS and connect to your SQL Server instance.
-
Click New Query in the toolbar.
-
Enter the following script definition, replacing <database name> with the name you want to use for your database and <path\database file> with the actual file location of your database.
USE [master]
GO
CREATE DATABASE [<database name>]
ON
( FILENAME = N'<path\database file>' )
FOR ATTACH_REBUILD_LOG
GO
For example:
USE [master]
GO
CREATE DATABASE [2024Study]
ON
( FILENAME = N'C:\Users\CoupaUser\Downloads\2024Study.scgm' )
FOR ATTACH_REBUILD_LOG
GO
-
Click Execute to run the script. Your database (using the <database name> value is displayed in the Object Explorer.
Troubleshooting database attachments
You can run into conditions that prevent your database from attaching successfully. Two example cases are described below:
Problem: Network Path Error
When attempting to attach the database, you see an error like this one:
-
If the Associated Files panel shows both the database file (.scgm or .mdf) and a log file (.ldf), remove the .ldf file when attaching the database. This is described in Step 2 of “Attach a database using the SSMS UI”.
-
If there is nothing listed in the Associated Files panel, use the method described in “Attach the database using a T-SQL script”.
Problem: Access is denied error
This error is related to the permissions assigned to the .mdf/.scgm and .ldf files: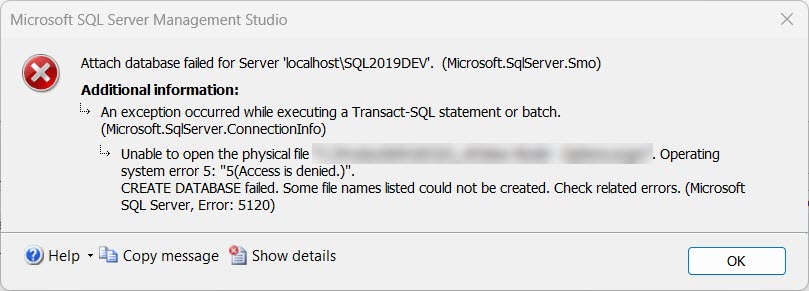
-
In Windows Explorer, navigate to the folder where the database (.mdf or .scgm ) and optional .ldf file(s) are located.
-
Right-click on the file and select Properties.
-
On the Security tab, click Edit.

-
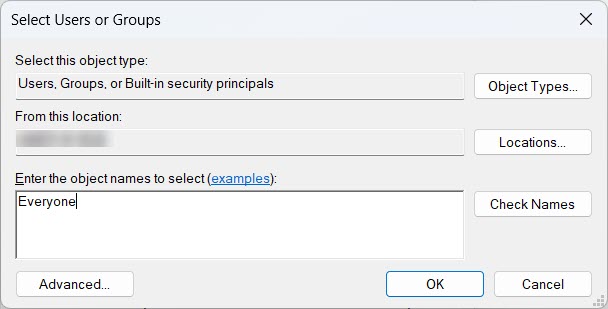
Click Add…
-
In the “Enter the object names to select” field, enter Everyone, then click OK.
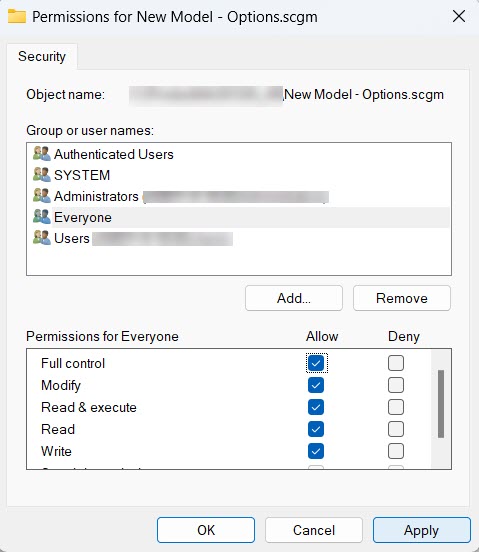
-
With the Everyone user name selected, click the Allow checkbox for Full control, then click Apply.
-
Click OK twice to close the Properties.
You can now try attaching the database to your SQL instance.
Last modified: Friday October 25, 2024