Import data
The import feature allows you to import data from Excel .xlsx or .csv (comma separated value) format files to your input tables. For successful import, please note the following:
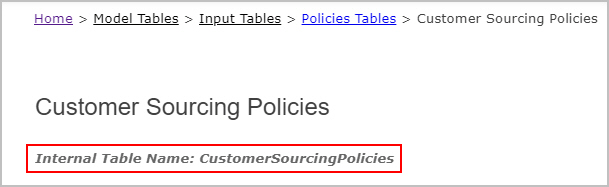
- When using Excel as the source, the Excel file must have a worksheet with the name of the input table. Note that the required name may be different than the table name displayed in the user interface. If the worksheet name is not correct, the import will fail and you will receive a notification providing the expected worksheet name. To determine the table name, open the help topic associated with the table. At the top of the topic you see Internal Table Name:
- The import source file must include required column names. For example, if you are importing Customer Sourcing Policies, you must have Customer, Product and Source columns. If required columns are not included, the import will fail and you will receive a notification with the expected column names.
- The import source file must have column names that match those in the input table. The names are typically the same as displayed in the user interface.
You can export an input table to get the required worksheet name and column names. Table and column names are also documented in the Model Studio help.
- If you are importing from a csv file to the model (from the Models page), you must use a .zip archive that contains a separate csv file for each table in the model database.
- Values in columns that do not match those in the table will be ignored.
- When values are not populated for columns will default values, the default values will be used when the data is imported. For example, if you do not include a Status column in your import file, the records will have a value of Include populated for Status.
- In csv files, Coupa recommends enclosing string values in double quotes, including empty strings, such as
"CZ_1","","London","","United Kingdom",""
All existing data in the input table is replaced when you import from an Excel or csv file, and the import is not reversible. When using Excel, the number of imported rows is limited to 1,048,576 rows. The number of rows is not limited with csv files.
- Open the Models page
 .
. - Select the model into which you want to import.
- Click Import. You see the Import New Data fly out.
- Use the method based on your source file type:
- If the source is Excel, browse to the folder where the Excel file is located, then select the file and click Open. The file name is populated on the fly out.
- If the source is csv, create a .zip archive that contains a separate csv file for each table in the model database, browse and select the .zip file and click Open. The file name is populated on the fly out.
- Click Import. The data is imported to the tables in the selected model.
You receive an email with the details of the import, including any errors encountered during the import process.
- Open the input table where you want to import data.
- Click Import. You see the Import from table fly out.
- Browse to the folder where the Excel or csv file is located, then select the file and click Open. The file name is populated on the fly out.
- Select one of:
- Replace - Replaces all data in the target table by deleting rows before import. This is the default action.
- Append - Appends rows from the source file to those already in the targeted table. If any of the records to append already exist in the table, the import fails.
- Click Import.
- If you are using Replace, click Confirm if you want to replace all existing data.
You receive an email with the details of the import, including any errors encountered during the import process.
Last modified: Friday May 12, 2023