Model recipe workspace tables
The Decision Data Model (DDM) workspace tables associated with model recipes enable you to extend the capabilities of the current Model Building features. For example, you may want to populate additional model tables not yet included in Model Building using data in your DDM.
To handle the aggregation and scope settings that you define in your model recipes, the recipe workspace tables in the DDM indicate what the recipe data represents, such as filtered and aggregated values. You can then use macros to perform joins, aggregations and calculations on both the standard and the recipe workspace DDM tables to insert data into your model tables. The data will be at the appropriate level for any of the aggregations in your model recipe.
The workspace tables are associated directly with the recipe you used to create them. They have names with a format of:
MB_<recipeGUID>_LKU_<entityname>
where:
<recipeGUID> is the first 8 characters of the GUID (globally unique identifier) that is associated with your recipe.
<entityname> is the name of the model entity, such as Sites or Products, that the table represents.
When you delete a recipe, the workspace tables associated with that recipe are deleted from the DDM. Keep this in mind when using these workspace tables in macros or apps.
Use the Quick Start: Build Production Constraints using extended logic exercise to learn how you can blend and insert data into your model tables using the workspace tables.
Generating the recipe workspace tables
Use the Summary node in your model recipe definition to enable the recipe workspace tables. A table will be generated for each of the Core Elements you have selected in Configuration.
-
In the model recipe, click on the Summary node.
-
Enable the Generate Recipe Workspace Tables switch. If you are editing an existing recipe, a list of the tables that will be generated is displayed.
-
Save the recipe.
-
Run the recipe. The workspace tables are populated in the DDM.
Reviewing the recipe workspace tables
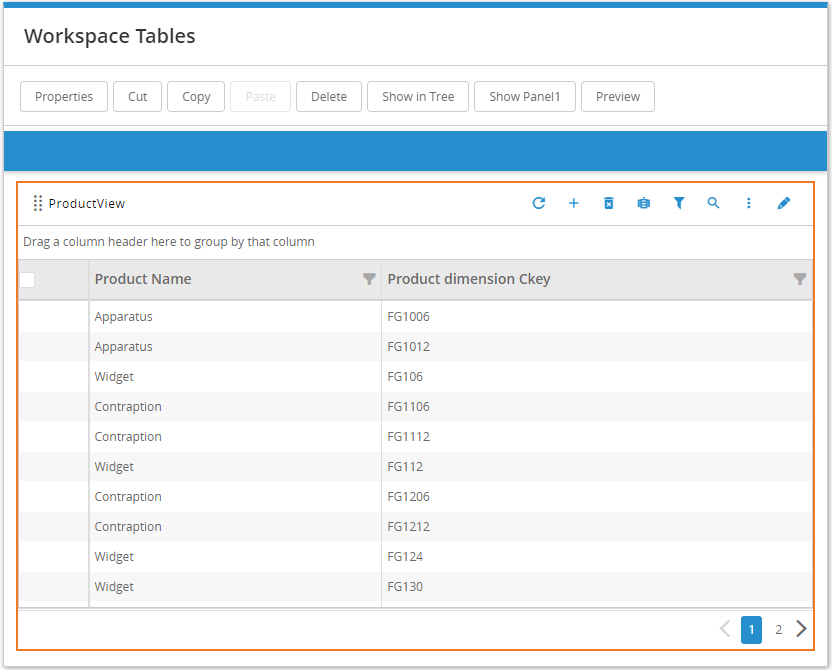
Once you have run the recipe, you can review the data in the workspace tables using grids in App Studio.
-
In an App Studio project, add an App Board, then configure it with a Grid planner widget.
-
On the General tab, select your DDM as the Connection Name.
-
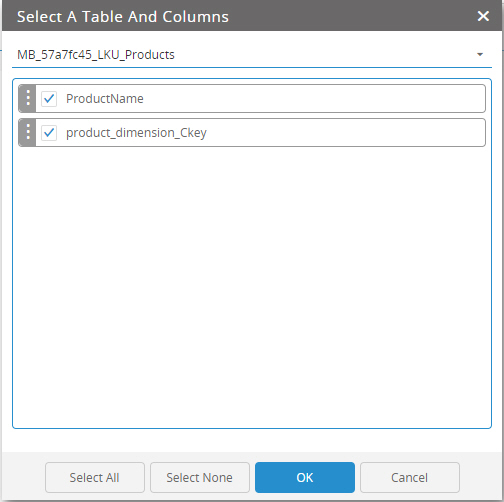
On the Columns tab, click Add Table Columns.
-
Select the workspace table name. For example, to display columns from the Products workspace table, select the name in the format MB_<RecipeGUID>_LKU_Products where <RecipeGuid> is the first 8 characters of the recipe ID, as displayed on the Model Building Summary page. By default, all columns are selected:
-
Click OK to select the columns, then OK again to close the Grid Properties. If your model recipe aggregates the data, you will see the aggregated name, as shown in this example: