Task Scheduler
Data Guru’s Task Scheduler allows you to create basic tasks from within the application that are then added to the Windows Task Scheduler, where they can be further defined if necessary. Tasks such as starting Data Guru and running a specific macro or workflow can be scheduled to run during a more convenient and efficient timeframe.
-
Click the Task Scheduler icon
 on the ribbon to display the Schedule Execution window.
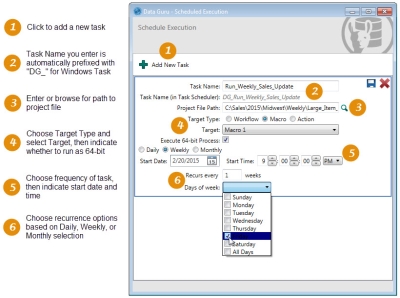
-
Click Add New Task, and then define the task:
- Enter the Task Name and note that, as you type, the name you enter is prefixed with DG_ in the space below the field. As indicated, this is the name that appears in the Windows Task Scheduler.
- Specify the Project File Path (.proj) by typing it in manually or using the browse icon.
- For Target Type, select the type of entity to be run -
- Workflow
- Macro
- Action
- Select the specific Target from the drop-down list, which is populated based on the selected target type.
- If you are using a 64-bit operating system, but the task will require 32-bit database engine drivers, clear the checkbox for Execute 64-bit Process. Note that if you are running a 32-bit operating system, this checkbox will not appear.
- Choose the frequency at which the task will execute -
- Daily
- Weekly
- Monthly
You cannot schedule a task to be executed one time only. - Use the Start Date and Start Time fields to indicate when the task should begin recurring.
- Based on the frequency at which the task is executed, additional options are available to specify the exact recurrence of the task -
- Daily - Specify the number of days between each recurrence.
- Weekly - Specify the number of weeks between each recurrence and, for that recurring week, select the days of the week on which the task executes.
- Monthly - Select the months for each recurrence and, for each recurring month, select the days on which the task executes.
-
Once you have completely defined the task, the Save icon
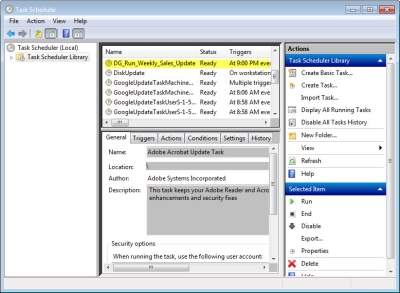
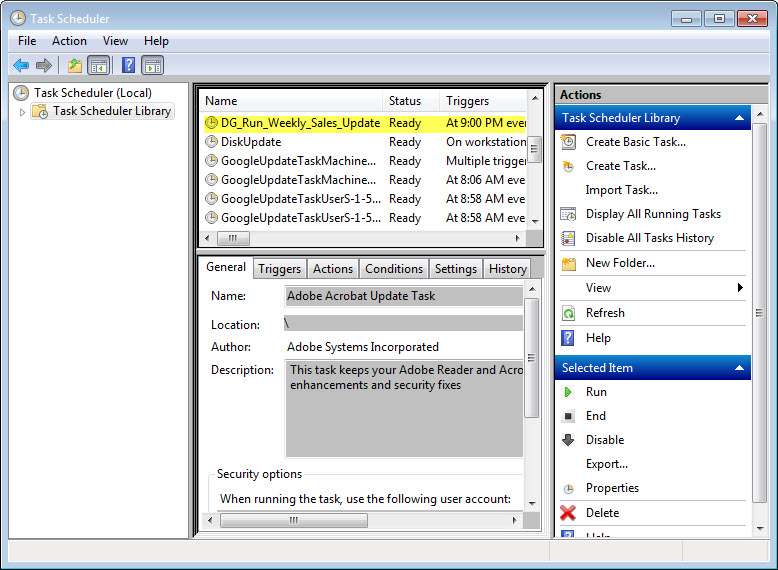
 is enabled; click the icon to create the task and add it to the Windows Task Scheduler. The task is added to the scheduler’s root folder.

To delete the task, you can click the Delete icon ![]() on Data Guru’s Schedule Execution screen, or delete it from within the Windows Task Scheduler.
on Data Guru’s Schedule Execution screen, or delete it from within the Windows Task Scheduler.
Last modified: Thursday December 19, 2024