Creating a populated record set
The Insert Data Import ![]() action allows you to manually enter records to create an output record set that can be used to create a new table or append onto an existing table. You can:
action allows you to manually enter records to create an output record set that can be used to create a new table or append onto an existing table. You can:
- Copy schema to utilize the structure of an existing table when defining an output record set
- Type or paste data into the grid
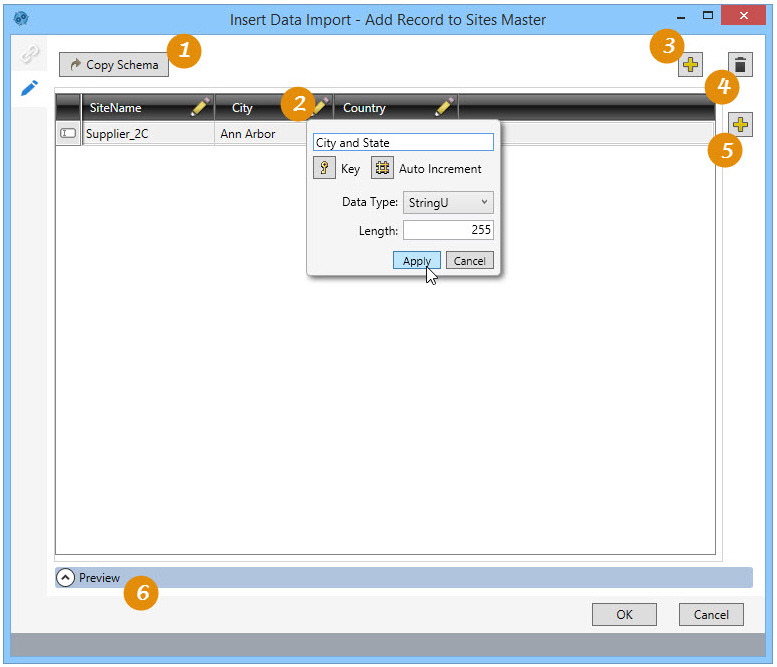
On the Configuration tab:
-
Click Copy Schema to copy existing table schema.
-
Define/edit column.
-
Click to add columns to new table.
-
Click to delete data and schema of new table.
-
Click to add rows.
-
Preview data or SQL results.
Possible applications include:
- Copy and paste values from Excel into the Insert Data grid
- Manually enter records into the Insert Data grid
Create and populate a record set
- Drag the Insert Data Import icon onto the design surface.
-
On the Connections tab
 , enter a Name and a Description to identify the action, then select the output database and table:
- For Create/overwrite a table, enter the names of the table being created or overwritten. Using this mode, you can also choose to -
- Add a new _autokey field to the table, with incremented values that make each table row unique. This is required by some database types.
- Indicate that the table should be deleted after the macro or workflow has executed.
- For Use an existing table, select the table to be used from the drop-down, and indicate whether to clear the table before execution.
- For Create/overwrite a table, enter the names of the table being created or overwritten. Using this mode, you can also choose to -
- On the Configuration tab
 :
:- To use an existing table as a template, click Copy Schema, and select the Database Connection and Table Name of the existing table when prompted. Note that when you use an existing table, you are adding records using the existing table structure.
- Click the Add icon
 next to the grid to add a new row.
 - To Cut, Copy or Paste a cell’s contents, select the contents, then right-click and select the operation to be performed.
- A right-click menu is also available for performing tasks on one or more selected rows or columns (use Ctrl + click to select multiple rows or columns).
For Rows -
- Paste Data with headers
- Paste Data
- Clear Data
- Delete selected rows
For Columns -
- Select column
- Un-select column
- Delete this column
- Delete selected columns
- When enabled for new tables, you can -
- Click the Add icon
 above the grid to add a new column.
 - Click on the Edit icon next to a column’s name change its name or data type and, depending on the type, other properties of the field.
- Click the Delete icon above the list of columns to remove all columns from the table.
- Click the Add icon
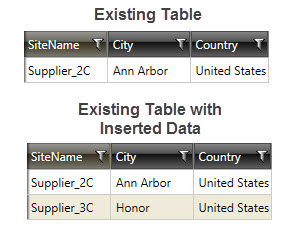
Insert Data Import data example
In the following example, a new record set has been inserted into an existing table:
Last modified: Thursday December 19, 2024