Field Mapping
For actions that can output to an existing table, you can use field mapping to map the action’s output to the existing table’s definition. This allows you to create more efficient workflows. Actions for which field mapping is available include:
- Database Import
- Aggregation
- Data Fork
- Select
- Table Union
- Unpivot
- Weighted Average
For these actions, an additional Mapping tab ![]() is available on the action’s configuration form that allows you to map selected fields individually, or map all fields automatically by selecting one of several different types of mapping, including:
is available on the action’s configuration form that allows you to map selected fields individually, or map all fields automatically by selecting one of several different types of mapping, including:
- by field name
- by field name and data type
- with fuzzy matching by name
- by column position
For example, if you have selected Use Existing Table for a Database Import action, the Mapping tab might initially look like this -
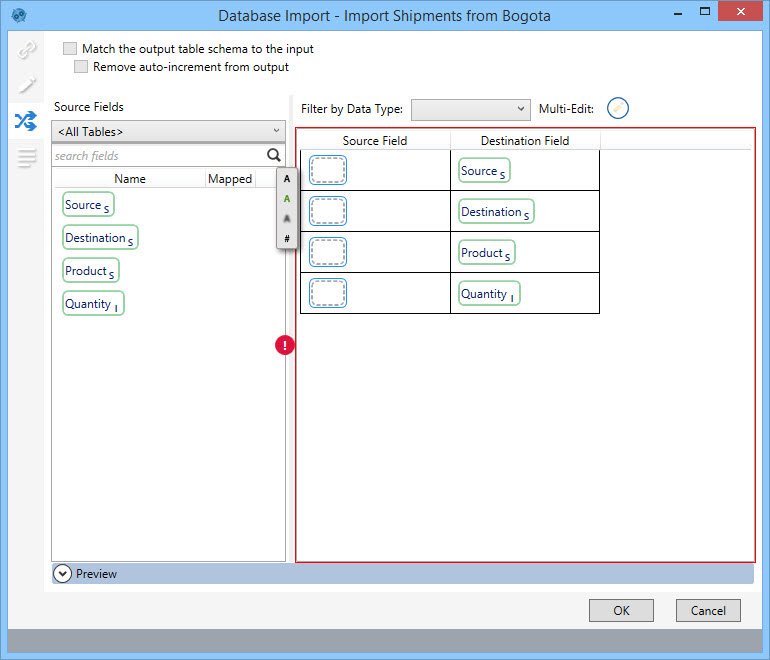
For this action, as with other import actions that include the Mapping tab, the Mapping tab also includes the following options:
- Match the output table schema to the input – Select this choice if the input and output table columns are arranged in the same order, with the same number of columns and the same column names. If selected, then mapping cannot be edited.
- Remove auto-increment from output – Enabled only if the match option is selected.
- Filter by Data Type - select to filter the list of mapped fields by data type.

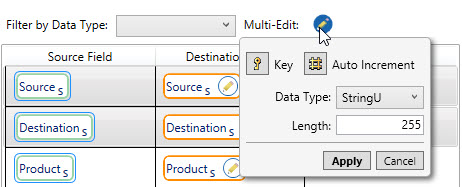
- Multi-Edit - Edit the properties of several fields at once, including data type. Click on a field, then use Ctrl + click to select additional fields, and click on the Multi-Edit icon.
To map selected fields:
- Drag a field from Output Fields to the Mapped Output Field area, dropping it on the empty field icon next to the Target Table Field to which it should be mapped. Repeat this procedure to map additional fields.
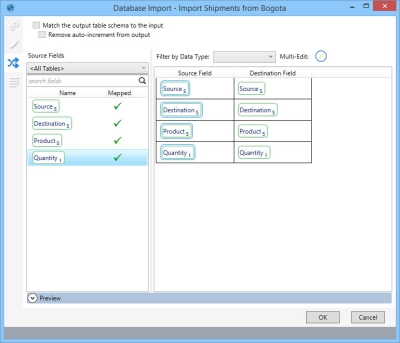
- Mapped fields are also indicated by a checkmark in the Mapped column of the Output Fields area.
- To remove the mapping of an individual field, hover over the field in the Mapped Output Field area to display the Delete icon, then click on the icon.
- When this action is executed, only the selected mapped fields are updated.

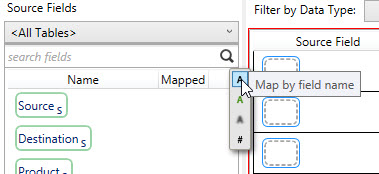
To map all fields automatically using one of the available mapping schemes:
- Hover over the Source Fields area to display the list of available mapping types, and select the type of mapping to be used.
- All fields that can be mapped based on the mapping type are placed appropriately in the Mapped Output Field area. The Mapped fields are also indicated by a checkmark in the Mapped column of the Output Fields area.

- When the action is executed, all mapped fields are updated.
- To remove the mapping of an individual field, hover over the field in the Mapped Output Field area to display the Delete icon, then click on the icon.

Last modified: Thursday December 19, 2024