Creating Tables
The Create Table ![]() action allows you to define the column names and data types of a new database table. You can:
action allows you to define the column names and data types of a new database table. You can:
- Assign primary key and auto-increment fields
- Optionally, copy schema or table structure from another database table
-
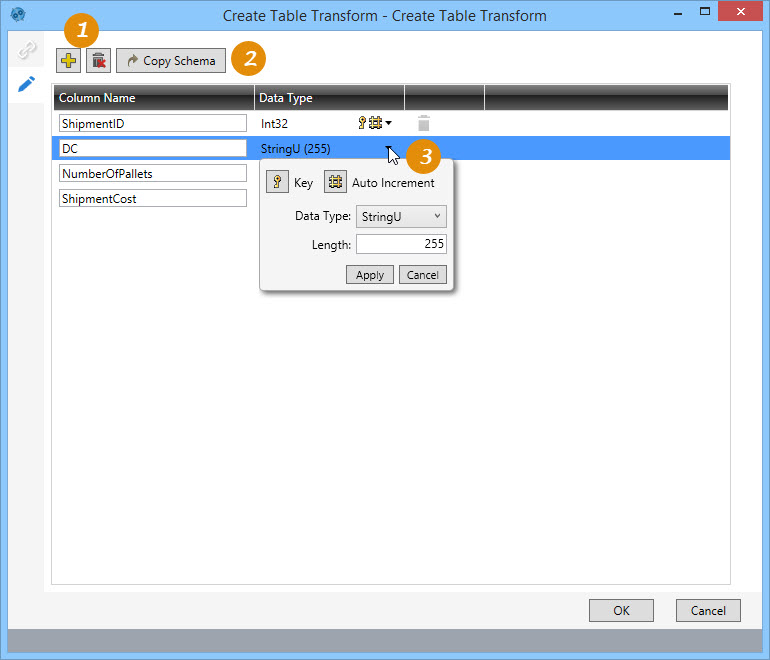
Click to add columns to new table.
-
Click to copy existing table schema.
-
Define properties for each column.
A potential application for this action might be to create the structure of an empty database table, and write records to this new table in a downstream action.
Create a table
- Drag the Create Table icon onto the design surface.
-
On the Connections tab
 , enter a Name and a Description to identify the action, then select the database and table containing the field:
- Database Connection – Select the database in which the table is being created, or choose New Database Connection to establish a new connection.
- Table Name – Enter the name of the table being created, and indicate whether the table should be deleted after the macro or workflow has executed.
-
On the Configuration tab
 :
:
- To use an existing table as a template, click Copy Schema, and select the Database Connection and Table Name of the existing table when prompted.
- Click the Add icon
 to add a new column.
 - Click on a field to change its value -
- Column Name – Specify the name of the column.
- Data Type – Define the data type and, depending on the type, other properties of the field.
- Select Key if the field is to be used as a key for identifying records in the table.
- Select Auto Increment if the field will be an auto-incremented key field.
- Indicate other properties if necessary; for example, if the data type is StringU, indicate a Length for the string.
- Status – Click the Delete icon in a column’s row to remove that column from the new table.
- Click the Delete icon above the list of columns to remove all columns from the table.
Last modified: Thursday December 19, 2024